前言
最近把一设备(wky)刷成armbian系统折腾了一翻,下面就整理一下这些天所折腾的内容,做个记录。
armbian介绍
Armbian是轻量级的Debian系统和为ARM开发板专门发行并重新编译的Debian系统(Ubuntu也派生自Debian)。
root密码是1234。
它支持的芯片主要有全志 A10, A20, A31,H2+, H3,H5, A64,Amlogic S805,Amlogic S905,Actionsemi S500,
飞思卡尔/ NXP iMx6,Marvell Armada A380,三星Exynos 5422,RK3288等。
如今大部分网络机顶盒及所谓的那些挖矿设备大都是基于上述这些cpu设计的板子,
所以自己可以将这些设备刷机为armbian系统,
就成了一个很小型的Linux主机,不但可玩性提高,而且和可实现的功能就更高了。
不过配置有高有低。刷机过程请自行去论坛等地方搜索,这里不做介绍。
armbian也分为带桌面版本和不带桌面版本,根据自己的需要和机器的配置进行选择。
armbian国内源替换
执照如下步骤先将国外源改为国内源后,以后安装和更新软件时下载速度就会快一些,
这里使用的是中国科学技术大学的armbian源。
阿里的armbian源我也看了一下,好像没在更新了。
1、编辑/etc/apt/sources.list文件;
nano /etc/apt/sources.list
2、将原来的每一行内容都在开头处用#号注释掉,然后将如下内容粘贴进去放在原来的内容后面;
deb http://mirrors.ustc.edu.cn/debian stretch main contrib non-free
deb http://mirrors.ustc.edu.cn/debian stretch-updates main contrib non-free
deb http://mirrors.ustc.edu.cn/debian stretch-backports main contrib non-free
deb http://mirrors.ustc.edu.cn/debian-security/ stretch/updates main contrib non-free
3、编辑/etc/apt/sources.list.d/armbian.list文件;
nano /etc/apt/sources.list.d/armbian.list
4、将原来的每一行内容都在开头处用#号注释掉,然后将如下内容粘贴进去放在原来的内容后面;
deb https://mirrors.tuna.tsinghua.edu.cn/armbian stretch main stretch-utils stretch-desktop
5.执行更新;
apt-get update && apt-get upgrade
搭建nginx环境/PHP环境/mysql环境
sudo apt update
sudo apt install build-essential
sudo apt install libpcre3 libpcre3-dev
```
- 否则,你可能遇到这样的错误
- 错误1:HTTP rewrite module需要PCRE库。
- 错误:make命令没有找到所需的目标'build'。
```bash
./configure: error: the HTTP rewrite module requires the PCRE library.
You can either disable the module by using --without-http_rewrite_module
option, or install the PCRE library into the system, or build the PCRE library
statically from the source with nginx by using --with-pcre=<path> option.
root@armbian:/usr/local/nginx# make
make: *** No rule to make target 'build', needed by 'default'.  Stop.
```
```bash
sudo apt install zlib1g zlib1g-dev
apt-get -y install nginx
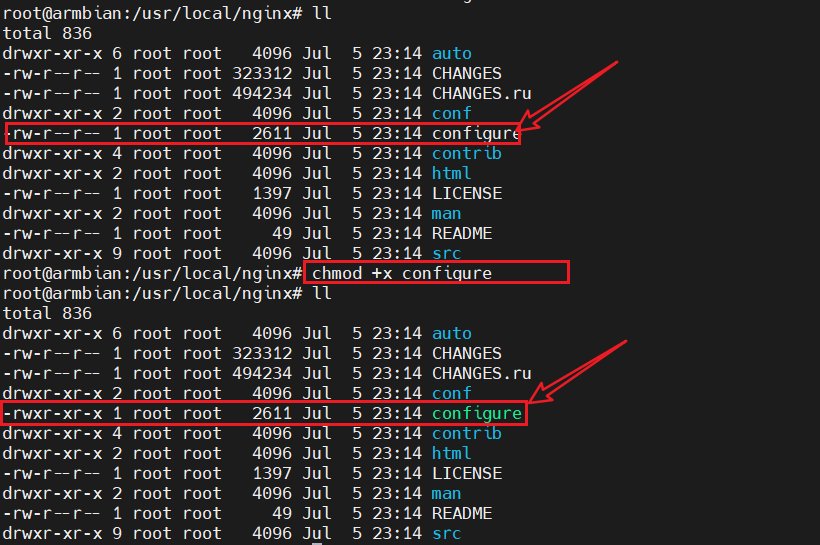
      #查看文件的权限
    ls -l configure
    #添加执行权限
    chmod +x configure
    #使用sudo命令以超级用户权限运行
    sudo ./configure
    make
    make install
2、安装php及其组件;
apt install -y php php-fpm php7.0-mysql php7.0-gd php7.0-curl php7.0-mbstring
3、安装mariadb;
apt install -y mysql-server
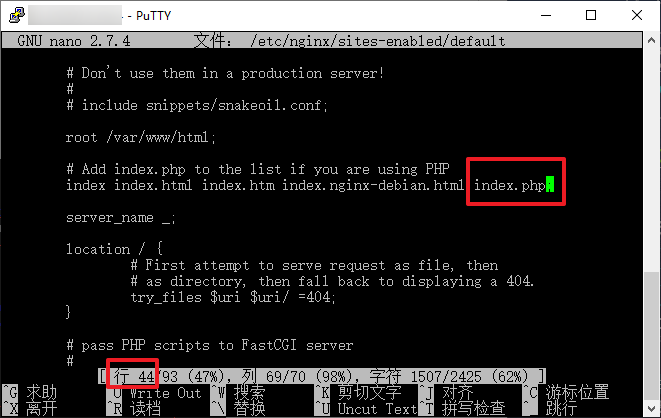
4、修改Nginx的配置文件;
nano -c /etc/nginx/sites-enabled/default
这里的nano -c意思是让nano打开文本时显示行号,方便查找所需要修改的行。
5、在第44行后面加上index.php;这里的行号可能会因nginx的版本不同有所变化,根据自己实际的行号找到图中所对应的行进行修改。
6、在第56-63行,按照如图所示,将第57和61行取消原有#注释,显示如下。这里的行号可能会因nginx的版本不同有所变化,根据自己实际的行号找到图中所对应的行进行修改。

7、重启 nginx服务
service nginx restart
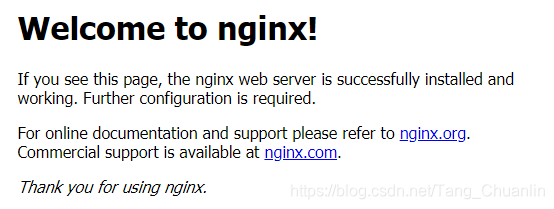
8、测试下nginx环境,手机或电脑浏览器访问设备IP,如192.168.1.200,可看到如下界面则说明nginx环境配置成功。
配置项 路径/文件
Nginx路径前缀 “/usr/local/nginx”
Nginx可执行文件路径 “/usr/local/nginx/sbin/nginx”
Nginx模块路径 “/usr/local/nginx/modules”
Nginx配置前缀 “/usr/local/nginx/conf”
Nginx配置文件路径 “/usr/local/nginx/conf/nginx.conf”
Nginx的pid文件路径 “/usr/local/nginx/logs/nginx.pid”
Nginx错误日志文件路径 “/usr/local/nginx/logs/error.log”
Nginx HTTP访问日志文件路径 “/usr/local/nginx/logs/access.log”
Nginx HTTP客户端请求体临时文件目录 “client_body_temp”
Nginx HTTP代理临时文件目录 “proxy_temp”
Nginx HTTP FastCGI临时文件目录 “fastcgi_temp”
Nginx HTTP uWSGI临时文件目录 “uwsgi_temp”
Nginx HTTP SCGI临时文件目录 “scgi_temp”
这些路径和文件是默认配置下的设置,可以根据需要进行自定义修改。可以编辑nginx.conf文件来更改Nginx的监听端口、虚拟主机配置、代理设置等。
常用命令
cd /usr/local/nginx/sbin/
./nginx  启动
./nginx -s stop  停止
./nginx -s quit  安全退出
./nginx -s reload  重新加载配置文件
ps aux|grep nginx  查看nginx进程
service mysqld restart
2、使用配置向导
mysql_secure_installation
输出如下(敲几个回车,设个密码,没什么难的):
Enter current password for root (enter for none):<–初次运行直接回车
Switch to unix_socket authentication [Y/n]
Set root password? [Y/n] <– 是否设置root用户密码,输入y并回车或直接回车
New password: <– 设置root用户的密码
Re-enter new password: <– 再输入一次你设置的密码
Remove anonymous users? [Y/n] <– 是否删除匿名用户,回车
Disallow root login remotely? [Y/n] <–是否禁止root远程登录,回车, 建议 N
Remove test database and access to it? [Y/n] <– 是否删除test数据库,回车
Reload privilege tables now? [Y/n] <– 是否重新加载权限表,回车
测试下环境
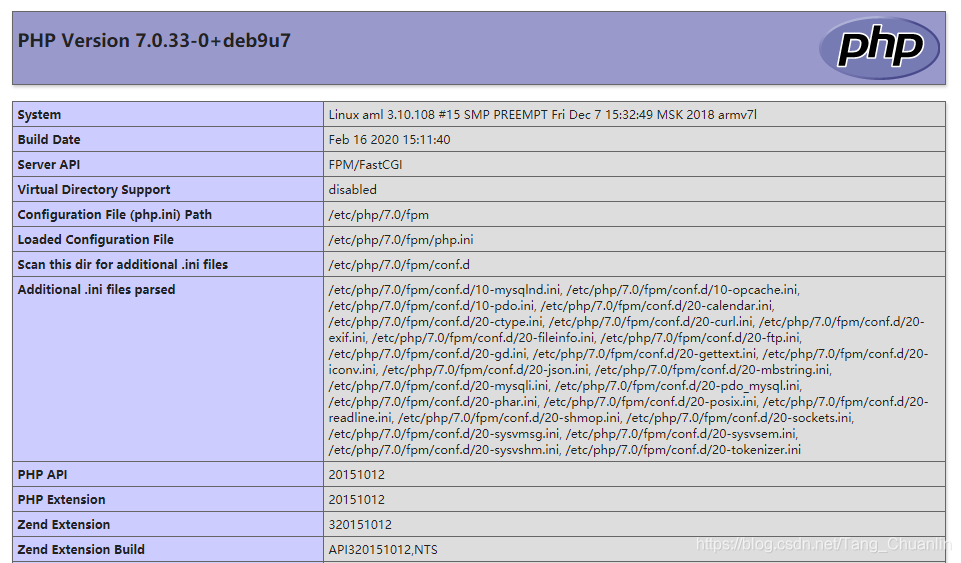
1、先创建个测试文件
echo "<?php phpinfo(); ?>" >/var/www/html/info.php
2、手机或电脑浏览器访问设备IP,如192.168.1.200\info.php,可看到如下界面则说明nginx环境和PHP环境配置成功。
可道云配置
cd /var/www/html
2、新建一个文件夹;
mkdir kodexplorer
3、依此执行以下每一行命令下载并安装可道云;
wget http://static.kodcloud.com/update/download/kodexplorer4.40.zip
unzip kodexplorer4.40.zip
chmod -Rf 777 ./*
返回顶部